Final Project
Due: May 14, 2021 @ 11:59 PM
Important Notes
- Read the submission instructions carefully!
Table of Contents
Final Projects
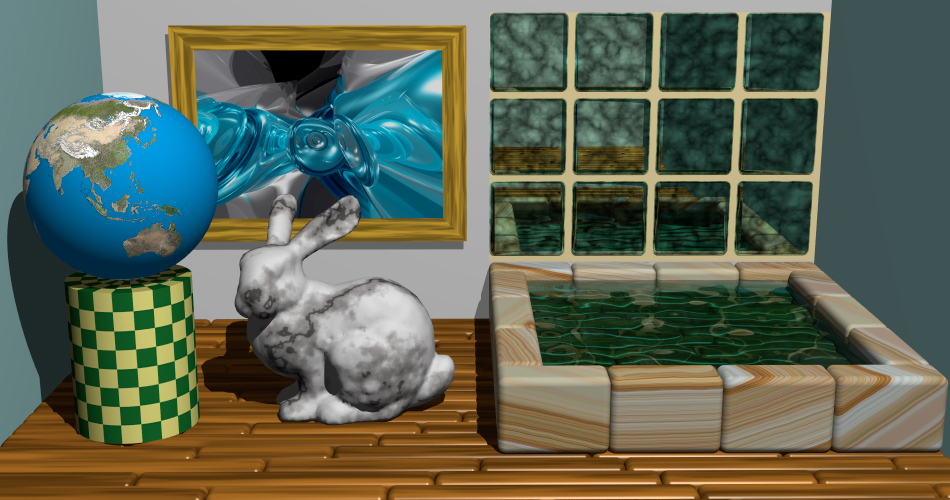
For your final project, you will choose a set of features to implement and demonstrate those features by producing rendered scenes in which they are apparent. Typically these new features can just be added to your existing ray-tracing code but you can create standalone demonstrations as well. For example, it may be easier to implement a simple fluid simulation outside of your existing code-base.
We have provided references that explain how these features can be implemented, but you can use other resources you discover on your own as well or instead our suggested sources.
The suggested projects below have weights associated with them. The total point value of all the weights of the features you choose to implement should equal the number of people on your team.
Deliverables
Each team will submit a report as a PDF document that uses the IEEE Visualization journal format.
Alternatively you can create a webpage that follows the same format as the PDF would have. If you create an animation, this is a better option since you can embed a link to YouTube or similar site. GitHub Pages is a free and easy to use option for creating and hosting the webpage.
Each team member should have their name and netid listed at the top of the report.
The report can be from 1 to 5 pages and should include the following sections:
- Abstract…3 or so sentences stating which features you implemented
- Resources…briefly describe which references/resources you used for each feature you implemented (e.g. Shirley’s books, etc.)
- Implementation…1 paragraph describing the hardware and OS of the system used to render your images and the programming language used to implement the renderer
- One section for each feature implemented. At least one paragraph should describe how the feature was implemented and should refer the reader to an image and describe how the feature is shown in the image. You should also refer to Performance Results Table and describe how performant (or not) the renderer is for that feature.
- At least 1 image for each feature implemented, demonstrating that feature.
- A table listing the render time and number of rays per pixel used to generate each image.
- Conclusion…short paragraph stating anything interesting you learned or how you would extend the code if you had time. Include a link to a repo containing the project code.
Topics
-
Photon Mapping This a a technique that has been used to produce high quality renderings of scenes that involve (1) caustics, (2) participating media and (3) transmission. If you choose to implement this, your scene should demonstrate at least one of those 3 features. You get an additional weight point for each additional feature you demonstrate.
References:
A Practical Guide to Global Illumination using Photon Maps
Weight: 2 to 5 -
Volumetric Rendering Participating media can also be rendered using more traditional volumetric techniques. Again each type of volumetric object implemented beyond the first is worth an additional point.
References:
Production Volume Rendering SIGGRAPH 2017 Course Notes
Production Volume Rendering by Magnus Wrenninge UIUC library link to book
Weight: 2 to 5 -
Glossy Specular Reflection Implement the BRDF from Ray Tracing from the Ground Up that allows you to render shiny objects that have some scattering.
References:
Ray Tracing from the Ground Up: Chapter 25
Weight: 2 -
Fluid Modeling There are a number of ways to model fluids (meshes versus particles, etc.). You will need to choose one and then implement some simulation of fluid behavior, and you will need to animate (render multiple frames). You may find it easier to implement this in WebGL depending on the approach you take.
References:
Fluid Simulation for Animation
Fluid Simulation for Computer Graphics by Robert Bridson UIUC Library link to book
Weight: 3 -
Ambient Occlusion Simple and non-physical but effective technique for adding indirect shading and soft shadow-like features
References:
Ray Tracing from the Ground Up: Chapter 17 by Kevin Suffern
Weight: 1 -
Animation Render multiple frames that you make into a movie using Adobe Premiere or DaVinci Resolve or something similar. You will need to implement some sort of kinematics system so that the objects move from frame to frame…the number of points for this project can be increased if you implement a more complicated physics and/or collision detection system.
References:
Computer Animation by Rick Parent UIUC Library link to book
Game Physics by Ian Millington UIUC Library link to book
Real-Time Collision Detection by Christer Ericson UIUC Library link to book
Weight: 2 -
Image-based Texture Mapping Add support for texture mapping images onto a surface in your ray-tracer. References:
Ray Tracing from the Ground Up: Chapter 29
Weight: 1 -
Procedural Texture Mapping Add support for procedural texture mapping of surfaces and/or solids.
References:
Ray Tracing from the Ground Up: Chapter 30 by Kevin Suffern
Weight: 1 -
Constructive Solid Geometry Add support for modeling objects using CSG…creating interesting surfaces using solids and boolean operations. At a minimum you should support spheres and boxes and the operators union, intersection, and difference.
References:
Wikipedia CSG Article
Weight: 2 -
Bezier Surfaces A Bezier surface is composed of joined polynomial patches…the Utah teapot was originally modeled using Bezier patches. Add support for a simple Bezier patch model representation of a surface. This one is easier than it may sound…you can convert the Bezier representation to triangles for intersection testing and use the patch polynomials to generate the normal at a hit point.
References:
Scratchapixel Bezier Article
The Essentials of CAGD by Farin and Hansford UIUC Library link to book
Weight: 2 -
Advanced Material Modeling You can model a different material by creating an appropriate BRDF for it, liked brushed metal for example.
References:
Digital Modeling of Material Apearance by Julie Dorsey UIUC Library link to book
Real-Time Rendering Chapter 9 Physically Based Shading Website
Weight: 1 for each BRDF implemented -
Motion Blur Add support for motion blur. Motion blur for a physical camera happens because the “shutter” is open for a certain amount of time. Therefore, what you are rendering is actually the average of what the camera sees while the shutter is open. That means if an object is moving, we want to sample it at random positions along its trajectory during that time.
References:
Ray Tracing The Next Week: Chapter 2
Weight: 1
Alternative Projects
If you wish to propose an alternative project (e.g. implement a simple ray-tracer in CUDA), you can. Just contact the instructor on CampusWire and ask if your idea is appropriate.
CUDA Ray Tracer resource NVIDIA Blog Post
4 Credit Students
If you are taking the course for 4 credits, you should implement an additional feature of weight \(1\). If you would prefer to implemeent a feature not on the list or would prefer to read and present a research paper instead, just contact the course staff and we can finalize those details.
Submission Instructions
Hand-in will be done on Compass.
| Name | Points | Description |
|---|---|---|
| Required Features | 40 | Implement features with weight equal to the number of people on the team |
| Report | 10 | Submit report website or PDF describing the project |
| Total | 50 |